

Level 83, ilvl 505
84
Garlemald (X:10.9, Y:7.9, Z:-1.7)
 Gateway of the Gods
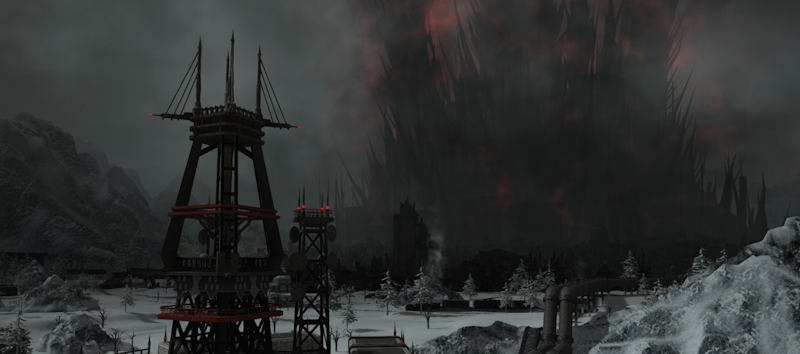
From the ruins of the Garlean imperial palace rises the Tower of Babil, a monstrous edifice constructed by Fandaniel and Zenos's enthralled hordes. While its exact purpose has yet to be ascertained, it is here that the would-be orchestrators of the Final Days await the Warrior of Light, who now spearheads a daring mission to infiltrate the tower and vanquish the Telophoroi once and for all.
During the fight, the boss will initiate a Ground and Pound attack on Lugae and create a ring around the arena that inflicts the player with a debuff called Electrocution, causing damage over time for fifteen seconds. Ground and Pound is an area of effect attack that targets a random player with a delayed marking. Another move called Dynamic Pound occurs when the boss moves to the north edge of the arena and creates a line area of effect. The players are assigned a Polarity, and if their Polarity matches the AoE's Polarity, they will be pushed back; if their Polarity is opposite, they will be pulled in. Failure to move accordingly can result in being knocked into the ring at the edge of the arena. Shocking Force requires all players to stack in one place to mitigate damage as a random player receives a stack marker. Dynamic Scrapline tethers both the players and the boss together with assigned Polarities. Similar to Dynamic Pound, players with the same Polarity will experience a knockback, while those with opposite Polarities will be pulled in, causing heavy damage and knockback if failed. Thundercall involves the boss summoning three lightning orbs around the arena and dropping a point-blank area of effect attack. Players must position themselves in safe spaces away from the boss and between the orbs to avoid taking heavy damage and knockback. These mechanics continue until the boss is defeated.
The boss fight involves various mechanics that players need to be aware of. Firstly, there is the unavoidable roomwide AoE called Thermal Suppression. Players must mitigate and heal through this attack. Next is the Magitek Missle, which targets two random players with AoEs. To avoid this, players need to move out of the way. The boss also uses Magitek Ray, firing a line AoE in the direction of a random player. After these attacks, the boss moves to the center of the arena and activates two plates, each triggering one of two abilities. Magitek Chakram summons Chakrams on the arena's perimeter, and players need to step on the Purple Plate to debuff themselves with Minimum, making the attack miss them. On the other hand, Downpour fills the arena with water, debuffing players with Heavy and stacking Breathless every second. Stepping on the Green Plate debuffs players with Toad, removing the stacking debuff and resisting further stacks. During these phases, the boss continues to fire attacks, requiring players to move strategically, especially when debuffed with Toad. It's important to note that stepping on the incorrect plate can be reversed by stepping on it again. Additionally, there is the Magitek Explosion where three large bombs drop on the arena and later explode in untelegraphed cross-line AoEs. Players must find the safe zone to stand in before they explode. The boss will continue to repeat these attacks until it is defeated.
During the Anima fight, several mechanics are introduced. First, the Lunar Nail ability causes nails to drop onto the edge and center of the arena, which then tether to each other. Quadrants with tethers on all four sides will be filled with an AoE, so players must move to safe quadrants to avoid taking damage. The Phantom Pain ability is cast to execute the AoE from Lunar Nail. Mega Graviton is an unavoidable room-wide AoE that summons a Mega-Graviton in each corner of the room. Pater Patriae creates a line AoE down the center of the room. Aetherial Pull occurs when each Mega-Graviton tethers to a player, who must run to the opposite side of the arena. If players don't move far enough away, they will take heavy damage and a Vulnerability Up stack. The Boundless Pain ability causes the boss to draw Aether, pulling all players to the center of the room and hitting them with a continuous expanding AoE. Players must run to the corners of the room to escape. Imperatum pulls players into the floor to face the lower half of Anima, and a Chaos gauge slowly fills. If players fail to defeat the lower half before the gauge fills, Oblivion will wipe the party. Obliviating Claw spawns two sets of claws on the east and west edges of the arena. Players must stand in the gap between the first set of claws and then repeat for the second set. Erupting Pain marks two random players with AoEs that should be placed on the east and west edges of the arena, while the remaining two players stay clear. If the lower Anima is defeated before the Chaos gauge fills, Oblivion will deal little damage and the fight will reset. Otherwise, the party will be wiped. The boss will continue to cycle through these attacks until it is defeated, excluding Imperatum.